Foolproof Sourdough Starter Recipe in 5 Days
The Wild World of Sourdough: Your 5-Day Starter Adventure
The first time I created a sourdough starter, I felt like a mad scientist. There I was, stirring flour and water in a jar, waiting for the magic of fermentation to happen. Would it bubble? Would it rise? Or would it just sit there, mocking my culinary ambitions?
If you've ever dreamed of creating bakery-worthy sourdough bread with that perfect tangy flavor and delightfully chewy texture, you're in the right place. Making your own sourdough starter isn't just about following a recipe—it's about embarking on a small culinary adventure that connects you to thousands of years of baking tradition.
At DI ORO, we believe the best kitchen experiences combine creativity with the right tools. And while our award-winning spatulas might not be the star of your sourdough show, they'll certainly make stirring, folding, and managing your bubbly creation a whole lot easier. (America's Test Kitchen didn't name our Large Spatula their top pick for nothing!)
Ready to join the sourdough revolution? Let's dive into everything you need to know to create your very own sourdough starter in just five days.
What Exactly Is a Sourdough Starter?
A sourdough starter is essentially a live culture of wild yeasts and beneficial bacteria that you cultivate in your kitchen. Unlike commercial bread that relies on packaged yeast, sourdough harnesses the natural microorganisms present in your environment and in the flour itself. These microbes feast on the flour's starches, producing carbon dioxide (which makes your bread rise) and lactic acid (which gives sourdough its distinctive tangy flavor).
Think of your sourdough starter as a tiny ecosystem that you're nurturing. It's literally alive—a community of microorganisms that will become your baking partner. And unlike that basil plant you accidentally killed last summer (we've all been there), this living thing is surprisingly resilient.
Why Make Your Own Sourdough Starter?
Before we dive into the how-to, let's talk about why home bakers everywhere are obsessing over sourdough starter recipes:
- Superior Flavor: The slow fermentation process creates complex flavors that simply can't be replicated with commercial yeast.
- Better Digestion: Many people who struggle with commercial bread find sourdough easier to digest, thanks to the fermentation breaking down gluten and phytic acid.
- Longer Shelf Life: The acidity in sourdough naturally preserves bread, keeping it fresh longer without preservatives.
- Connection to Tradition: You're participating in one of humanity's oldest culinary traditions—people were making sourdough long before refrigeration or commercial yeast existed!
- Kitchen Pride: There's something deeply satisfying about creating bread from just flour, water, and patience.
Explore our award-winning kitchen tools to enhance your sourdough baking experience.
Essential Ingredients for Your Sourdough Starter Recipe

The beauty of sourdough is its simplicity. You only need two ingredients to get started:
Flour: Your Starter's Primary Food Source
While any flour can work, certain types will give your sourdough starter recipe a better chance of success:
- Whole wheat flour: My personal recommendation for beginners. The extra nutrients and wild yeast present in the bran help jump-start fermentation.
- Rye flour: Another excellent option for starting a sourdough culture, as rye sourdough starter tends to ferment quickly and vigorously.
- All-purpose flour: Works well for maintaining your starter once established, though it may take longer to get going initially.
- Bread flour: Higher protein content makes for a stronger starter, but like all-purpose, it may be slower to activate initially.
Many successful bakers, including those following the renowned King Arthur sourdough starter method, recommend beginning with whole wheat flour for the first few days, then transitioning to all-purpose or bread flour for maintenance.
Water: Quality Matters
The second ingredient is simply water, but not all water is created equal:
- Filtered water: Ideal because it's free of chlorine, which can inhibit fermentation.
- Tap water: Can work if your municipal water isn't heavily chlorinated. If you're unsure, let it sit out overnight to allow chlorine to evaporate.
- Bottled spring water: A good alternative if your tap water is heavily treated.
Water temperature matters too—aim for room temperature or slightly warm (around 70-75°F). Too cold, and fermentation slows; too hot, and you might kill the very microbes you're trying to cultivate.
Essential Tools for Sourdough Success
Before you embark on your sour dough starter recipe adventure, gather these tools:
- A glass or ceramic container: A wide-mouth jar works perfectly. Avoid metal containers as they can react with the acids in your starter.
- Kitchen scale: While not absolutely necessary, measuring by weight rather than volume ensures consistency—a crucial factor in sourdough success.
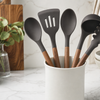
- A silicone spatula: This is where DI ORO's award-winning spatulas shine! Our seamless design makes it easy to stir your starter thoroughly and scrape down the sides of your jar without leaving any flour pockets. Plus, our forever-chemical-free silicone means nothing unwanted is coming in contact with your living starter.
- Breathable cover: A coffee filter, paper towel, or cloth secured with a rubber band allows air exchange while keeping contaminants out.
- Rubber band: Place it around your jar at the starter's initial level to track its growth.
Discover the kitchen utensils that can support your culinary journey.
Your 5-Day Sourdough Starter Recipe: Day by Day

Ready to begin your DIY sourdough starter? Let's break it down day by day:
Day 1: Awakening the Wild Yeasts
On the first day of your sourdough starter journey, you're essentially creating an inviting environment for wild yeasts and beneficial bacteria to make themselves at home.
- Combine equal weights of whole wheat flour and water in your jar. If using a scale (recommended), mix 50g of flour with 50g of water. If measuring by volume, use approximately 1/3 cup flour and 1/4 cup water.
- Stir thoroughly with your DI ORO silicone spatula until no dry flour remains. The mixture should resemble thick pancake batter.
- Scrape down the sides of your jar to keep things clean and prevent mold.
- Cover loosely with your breathable cover and secure with a rubber band.
- Mark the level on your jar with a second rubber band or marker.
- Place in a warm spot (70-75°F is ideal) away from direct sunlight.
Now comes the hardest part: waiting. Your starter needs about 24 hours to begin showing signs of life.
Day 2: The First Feeding
After 24 hours, you might not see much activity yet—maybe a few small bubbles if you're lucky. Don't worry! The microorganisms are just getting started. It's time for the first feeding:
- Discard half of your starter (about 50g). This might feel wasteful, but it's necessary to maintain the right ratio of food to microbes.
- Feed with equal parts flour and water (50g each). You can continue with whole wheat flour or begin transitioning to all-purpose.
- Stir thoroughly with your DI ORO spatula until completely combined.
- Cover and return to your warm spot for another 24 hours.
By the end of Day 2, you've completed the first crucial steps in your sourdough starter recipe. The mixture might not look dramatically different yet, but microscopic changes are happening. The wild yeasts and bacteria are beginning to multiply, creating the foundation of what will become your very own unique sourdough starter.
Your 5-Day Sourdough Starter Recipe: Days 3-5
Day 3: Signs of Life
By day three of your sourdough starter recipe journey, things should be getting interesting. Your starter might be showing more consistent bubbles and perhaps even a slightly sour aroma. This is the moment many bakers get their first real confidence boost—your microscopic friends are multiplying!
- Observe your starter before feeding. Look for bubbles throughout the mixture and a slight increase in volume—these are promising signs that fermentation is underway.
- Discard half of your starter (about 50g), just as you did yesterday.
- Feed with 50g flour and 50g water. If you started with whole wheat, you can continue transitioning to all-purpose or bread flour by using a 50/50 mix.
- Stir thoroughly with your DI ORO silicone spatula, ensuring no dry pockets remain. Our award-winning spatulas make this process effortless—the flexible edge reaches every corner of your jar while the sturdy core gives you perfect control.
- Cover and return to your warm spot for another 24 hours.
You might notice some changes in the aroma—perhaps a bit yogurty, fruity, or even slightly sour. These are all good signs! The beneficial bacteria are producing lactic and acetic acids, which contribute to sourdough's signature tang.
Day 4: Building Strength
Day four is when many sourdough starter recipes really start showing their potential. Your starter should be noticeably more active, with more consistent bubbling and perhaps even beginning to rise predictably after feeding.
- Examine your starter for increased activity. You might notice it's more aerated throughout, with a pleasant sour smell developing.
- Discard all but 50g of your starter. This keeps your jar from overflowing and maintains the optimal food-to-microbe ratio.
- Feed with 50g flour and 50g water. You can now transition fully to all-purpose or bread flour if you wish.
- Mix thoroughly with your DI ORO spatula. The seamless design prevents bacteria from hiding in crevices—just one of the reasons America's Test Kitchen named our Large Spatula their top pick!
- Mark the level with a rubber band to track rise more accurately.
- Cover and return to your warm spot for another 24 hours.
At this stage, your starter might begin showing more predictable patterns. After feeding, it may rise for several hours before beginning to fall again—a natural cycle that indicates healthy fermentation. Some bakers even name their starters at this point. (Mine's called Doughy Howser, M.D.—what can I say, I'm a child of the 90s!)
The Final Countdown: Day 5 and Beyond

Day 5: Ready for Baking?
By day five, your sourdough starter recipe should be showing strong signs of life. Here's what to look for:
- Observe your starter's behavior. A mature starter typically doubles in volume within 4-8 hours after feeding and develops a dome-like top with lots of bubbles.
- Perform the float test: Drop a small spoonful of recently-fed, active starter into a glass of room-temperature water. If it floats, it's likely ready for baking!
- Feed as usual: Discard all but 50g of starter and feed with 50g flour and 50g water.
- Consider increasing feeding frequency: For even better results, try feeding twice daily (every 12 hours) for a day or two before your first bake.
If your starter isn't quite there yet, don't worry! Some sourdough starters take 7-10 days to fully mature. Continue the daily feeding routine until your starter reliably doubles within 4-8 hours after feeding and passes the float test.
What If My Sourdough Starter Isn't Active Enough?
Troubleshooting is part of the sourdough journey. If your starter seems sluggish even after five days, consider these adjustments:
- Increase the temperature: Find a slightly warmer spot—the top of your refrigerator or near (not on) a warm appliance can work well.
- Try a different flour: Adding a bit of whole wheat or rye flour can jumpstart activity. Even King Arthur sourdough starter enthusiasts sometimes need this boost!
- Check your water: If you suspect your tap water is heavily chlorinated, switch to filtered or bottled spring water.
- Be patient: Sometimes starters just need a few extra days to build strength, especially in cooler environments.
Explore our new products to find the latest tools for your baking needs.
Understanding Your Sourdough Starter's Behavior
The Rise and Fall Cycle
A healthy sourdough starter follows a predictable pattern after feeding:
- Initial dormancy (0-2 hours): Not much visible activity as microbes wake up and begin feeding.
- Active rise (2-8 hours): The starter expands as fermentation produces carbon dioxide, creating bubbles throughout.
- Peak activity (4-12 hours): Your starter reaches maximum volume, with a domed top and honeycomb structure visible through the jar.
- The fall (8-24 hours): As food sources deplete, the starter begins to deflate. A layer of liquid (called "hooch") may form on top—a sign your starter is hungry.
Learning to read these cycles is key to successful sourdough baking. For most recipes, you'll want to use your starter at or just after its peak, when it's full of bubbles and has roughly doubled in size.
The Nose Knows: Understanding Starter Aromas
Your nose is one of the best tools for evaluating your sourdough starter recipe's progress:
- Fresh and fruity: A young, recently-fed starter often has a pleasant, yeasty aroma with fruity notes.
- Tangy and yogurt-like: As fermentation progresses, lactic acid bacteria create that classic sourdough tang.
- Sharp or vinegary: An unfed starter develops more acetic acid, creating a sharper smell. This isn't bad—just a sign it's hungry!
- Alcohol or acetone: A very hungry starter may develop a strong alcohol smell from the hooch. Simply stir it back in and feed.
What you don't want to smell: anything moldy, rotten, or truly offensive. While sourdough can smell quite pungent when hungry, truly foul odors could indicate contamination.
Moving Beyond the Basics: Flour Variations

Once your starter is established, you can experiment with different flours to create unique flavor profiles and baking properties:
Whole Wheat Sourdough Starter
A whole wheat sourdough starter tends to ferment more quickly and develop a deeper, nuttier flavor profile. The additional nutrients and natural yeasts present in the bran make for a vigorous starter that's perfect for rustic whole grain breads.
Rye Sourdough Starter
Rye flour creates an exceptionally active sourdough starter with distinctive flavor. Many professional bakers maintain rye starters for their reliability and the unique tang they bring to breads. Even adding just 10% rye flour to your regular feeding can boost activity.
Organic Sourdough Starter
Using organic flour for your sourdough starter recipe can make a noticeable difference. Organic flours are free from pesticides and often contain more naturally occurring yeasts and bacteria, potentially leading to more active fermentation and complex flavors.
Remember, your sourdough starter is adaptable—you can gradually transition between flour types by incorporating small amounts of the new flour with each feeding until you've completely switched over.
Maintaining Consistency with DI ORO Tools
Whatever flour you choose, maintaining consistency in your feeding routine is key to a happy, healthy starter. Our DI ORO silicone spatulas make this daily ritual a pleasure rather than a chore. The flexible, heat-resistant silicone (tested to 600°F!) glides smoothly against glass and ceramic, ensuring you capture every bit of your precious starter when stirring or scraping.
Plus, unlike wooden tools that can harbor bacteria in their porous surface, our forever-chemical-free silicone spatulas are non-porous and dishwasher safe—making them the perfect hygienic choice for maintaining your living sourdough culture.
Beyond the First Week: Maintaining Your Sourdough Starter
Congratulations, sourdough champion! If you've made it through the five-day sourdough starter recipe journey, you've successfully created life in your kitchen. Your starter is now a living ecosystem of wild yeasts and beneficial bacteria that will reward you with incredible bread for years to come—as long as you keep it happy.
Establishing a Maintenance Routine
Once your starter is reliably doubling after feedings, you can settle into a maintenance routine that fits your baking schedule:
- For frequent bakers (2+ times weekly): Keep your starter at room temperature and feed once daily with equal weights flour and water (1:1:1 ratio—starter:flour:water).
- For occasional bakers: Store your starter in the refrigerator and feed just once weekly. The cold temperature slows fermentation dramatically, putting your microbes into a sort of hibernation.
- For vacation or breaks: A mature starter can survive in the refrigerator for 2-3 weeks without feeding. For longer breaks, consider drying some starter as backup.
Our DI ORO jar scrapers are perfect companions for this maintenance phase, ensuring you capture every bit of your precious starter when transferring between containers. The flexible edge conforms perfectly to curved surfaces, leaving nothing behind—because when it comes to sourdough, waste not, want not!
The Refrigerator Method: A Busy Baker's Best Friend
If you're not baking daily, refrigeration is your sourdough starter recipe's best friend. Here's how to do it right:
- Feed your starter and let it sit at room temperature for 2-3 hours to get fermentation going.
- Place in the refrigerator with the lid slightly loose to allow gas exchange.
- When ready to bake, remove from refrigerator and let sit at room temperature for an hour.
- Discard all but 50g and feed with 50g flour and 50g water.
- Allow 4-8 hours for your starter to become fully active before using in recipes.
- Return unused portion to the refrigerator after feeding.
This method works beautifully for weekend bakers—take your starter out Friday evening, feed it, use it Saturday for baking, feed the remainder, and return it to the fridge Sunday after one more feeding. Your starter gets a weekend workout just like you do!
What to Make With Your Sourdough Starter
Now that you've mastered your sourdough starter recipe, a world of culinary possibilities opens up. While the classic sourdough boule is often the first project, your starter can do so much more:
Beyond Basic Bread: Creative Uses for Sourdough Starter
- Sourdough pancakes or waffles: The ultimate weekend breakfast, with a delightful tang that pairs perfectly with maple syrup.
- Sourdough pizza dough: Develop complex flavors that elevate your homemade pizza night to restaurant quality.
- Sourdough crackers: A brilliant way to use discard, resulting in crispy, flavorful crackers that will spoil you for store-bought forever.
- Sourdough english muffins: Those nooks and crannies taste even better with natural fermentation.
- Sourdough chocolate cake: Yes, really! The tang of sourdough beautifully complements chocolate for a uniquely sophisticated dessert.
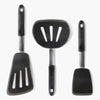
For each of these recipes, our DI ORO silicone spatulas provide the perfect balance of flexibility and strength—gently folding delicate dough without deflating those precious air bubbles you've worked so hard to develop. America's Test Kitchen didn't name our Large Spatula their top pick for nothing!
As you explore more recipes, consider checking out our latest articles, such as oven-roasted salmon with lemon dill or discover a new approach to garlic to complement your sourdough creations.
The Magic of Sourdough Discard Recipes
"Discard" is a bit of a misnomer—this portion of your sourdough starter recipe that you remove during feeding is actually a treasure trove of flavor and fermentation. While not active enough to leaven bread on its own, it adds incredible depth to all sorts of recipes:
- Quick breads and muffins: Add 100g discard to your favorite banana bread or muffin recipe for complexity.
- Flatbreads and tortillas: Combine discard with just enough flour to form a dough for incredible flavor.
- Batter for frying: The ultimate tempura or onion ring batter has sourdough discard as its secret ingredient.
- Brownies and cookies: Yes, sourdough works beautifully in sweet applications too!
With our forever-chemical-free DI ORO spatulas, you can confidently scrape every last bit of discard from your jar, knowing that what touches your food is as clean and healthy as your homemade sourdough.
The Science Behind Your Sourdough Success
Is Sourdough Alive? The Fascinating Microbiology
When people ask "is sourdough alive?" the answer is a resounding yes! Your sourdough starter recipe has created a thriving microbial community:
- Wild yeasts (primarily Saccharomyces and Candida species) consume simple sugars and produce carbon dioxide gas—creating those bubbles that make your bread rise.
- Lactic acid bacteria (including Lactobacillus) produce lactic and acetic acids, giving sourdough its characteristic tang and creating an environment hostile to unwanted microbes.
- Enzyme activity breaks down complex carbohydrates and proteins in the flour, improving digestibility and releasing more nutrients.
This living ecosystem evolves over time to reflect your local environment and the flours you use—which is why no two sourdough starters are exactly alike, even if they follow the same sourdough starter recipe. Your starter is truly unique to your kitchen!
The Health Benefits of Sourdough
Beyond incredible flavor, the slow fermentation of sourdough offers remarkable health advantages compared to commercial yeasted breads:
- Improved digestibility: The long fermentation process begins breaking down gluten proteins and phytic acid, making nutrients more bioavailable and the bread easier to digest.
- Lower glycemic index: The organic acids produced during fermentation slow down starch digestion, resulting in more stable blood sugar responses.
- Prebiotic qualities: Fermented foods like sourdough contain compounds that support gut health and your microbiome.
- Preserved freshness: The acidic environment naturally preserves your bread without artificial additives or preservatives.
When you combine these benefits with the mindful practice of sourdough baking, you're not just making bread—you're participating in a culinary tradition that nourishes both body and soul.
Becoming a Sourdough Artisan
As you continue your sourdough journey, you'll develop an intuitive understanding of your starter's rhythms and needs. You'll know by sight, smell, and even sound (yes, active starters actually make tiny popping noises!) when your starter is at its peak and ready to create magnificent bread.
For additional resources, consider exploring this guide on making a sourdough starter from scratch and a straightforward 5-day sourdough starter method.
Building Your Sourdough Community
One of the most delightful aspects of sourdough baking is the community it creates. Consider sharing your starter with friends—it's the gift that truly keeps on giving! A tablespoon of mature starter is enough to start someone else on their own sourdough adventure.
And don't forget to share your creations online using #DIORObakes. We love seeing how our tools help you create kitchen magic, whether you're a sourdough newbie or a seasoned baker.
For more inspiration and to learn about our latest kitchen innovations, check out our Designer Series blog post.
The Never-Ending Sourdough Adventure
Your sourdough starter recipe is just the beginning of a lifelong relationship with natural fermentation. As you gain confidence, experiment with different flours, hydration levels, fermentation times, and shaping techniques. Each loaf teaches you something new, and even "failures" are usually deliciously edible!
Remember, our DI ORO kitchen tools are designed to grow with you on this journey—from our award-winning spatulas that make starter maintenance a breeze to our precise measuring tools that help you achieve consistent results. We're in your corner, helping you create memorable meals that bring joy to your table.
So here's to your sourdough success—may your starter be bubbly, your crumb be open, and your crust sing that perfect crackling song as it cools. Happy baking, friends!
If you're interested in expanding your culinary skills further, explore our post on DI ORO Multi-Purpose Shears: Three Ways for a Summer Boil and discover new ways to utilize your kitchen tools.
Finally, for more tips and insights, visit Farmhouse on Boone's guide to making a sourdough starter to continue your sourdough adventure.
Frequently Asked Questions
how much sourdough starter to use
The amount of sourdough starter to use can vary depending on the recipe, but a common guideline is about 20-25% of the total flour weight. For example, if your recipe calls for 500 grams of flour, you would use 100-125 grams of sourdough starter. Adjusting this percentage can affect the flavor and texture of the final product.
how to add sourdough starter to any recipe
To add sourdough starter to any recipe, replace a portion of the flour and liquid with the starter. Typically, you'll substitute about 1 cup of flour and 1/2 cup of liquid with 1 cup of active sourdough starter. Be sure to adjust other ingredients as necessary to maintain the right dough consistency.
how to substitute sourdough starter in a recipe
When substituting sourdough starter in a recipe, replace a portion of the flour and liquid with the starter. Use 1 cup of starter in place of about 1 cup of flour and 1/2 cup of liquid. This substitution adds flavor and natural leavening, though you may need to adjust other ingredients to suit the fermentation process.
how to make sourdough starter recipe
To make a sourdough starter, combine equal parts of flour and water in a jar and let it sit at room temperature. Stir it daily and feed it with fresh flour and water every 24 hours, discarding half of the mixture each time. Within 5-7 days, your starter should become bubbly and active, ready for baking.
how to add sourdough starter to bread recipe
To add sourdough starter to a bread recipe, first ensure your starter is active and bubbly. Replace a portion of the flour and liquid in your recipe with the starter, typically around 20-30% of the total flour weight. Combine the starter with other ingredients, allow the dough to ferment, and proceed with the usual bread-making process.
what is the best sourdough starter recipe
The best sourdough starter recipe is simple: mix equal parts of whole grain flour and water, about 50 grams each, in a clean jar. Stir well, cover loosely, and store at room temperature, feeding it daily with fresh flour and water while discarding half of the mixture. This method nurtures a strong, resilient starter in about a week.
Please upload banner from store admin blog pages