Pecan Tassies Recipe: 5 Steps To Perfect Mini Pies
The best pecan tassies recipe transforms just a handful of simple ingredients into bite-sized masterpieces that'll make your guests think you've been secretly attending pastry school. These miniature pecan pies pack all the buttery, caramelized goodness of their full-sized cousins into perfectly portioned treats that disappear faster than you can say "seconds, please." Whether you're hosting your first holiday gathering or you're the designated dessert-bringer in your crew, mastering this old fashioned pecan tassie recipe is your ticket to legendary status in the kitchen.
Key Takeaways
- The pecan tassies recipe uses simple ingredients to create delicious bite-sized treats.
- These mini pecan pies offer the same buttery, caramelized flavor as full-sized pies.
- Pecan tassies are perfect for holiday gatherings and special occasions.
- Mastering this recipe can elevate your status as a skilled dessert maker.
Table of Contents
- What Are Pecan Tassies?
- Why Pecan Tassies Are Ultimate Crowd-Pleasers
- Essential Ingredients for Perfect Tassies
- Equipment That Makes the Difference
- Step-by-Step Pecan Tassies Recipe Instructions
- Storage and Make-Ahead Strategies
- Creative Variations and Serving Ideas
- Troubleshooting Common Pecan Tassie Challenges
- Frequently Asked Pecan Tassie Questions
- Elevating Your Pecan Tassie Game
- Mastering the Art of Pecan Tassies
Think of pecan tassies as pecan pie's sophisticated little sister—all the charm, half the commitment, and infinitely more shareable. They're the kind of dessert that makes people lean in closer at potlucks, asking for your "secret" (spoiler alert: it's using the right tools and not overthinking it).
What Are Pecan Tassies?
Pecan tassies are essentially miniature pecan pies nestled in tender, cream cheese pastry cups. The name "tassie" comes from the Scottish word for cup, which perfectly describes these little vessels of sweet, nutty bliss. Each bite delivers a symphony of textures: the flaky, buttery crust gives way to a gooey, caramelized pecan filling that's been kissed with vanilla and just the right amount of sweetness.
What sets tassies apart from regular pecan pie isn't just their adorable size—it's the cream cheese pastry that cradles the filling. This isn't your standard pie crust; it's richer, more tender, and has a subtle tang that plays beautifully against the sweet pecan filling. The result? A dessert that's somehow both elegant enough for your fanciest dinner party and approachable enough for a Tuesday night treat.
Southern Roots, Modern Appeal
Like many of the South's greatest culinary contributions, pecan tassies have humble origins but deliver sophisticated flavor. They emerged from the tradition of making the most of seasonal pecans, transforming them into something special enough for company but simple enough for everyday baking. The beauty of this pecan tassies recipe easy approach is that it honors those traditional roots while being totally doable for modern home bakers.
Today's pecan tassies have evolved beyond their Southern Living origins to become a beloved treat across the country. They're the perfect answer to our collective desire for portion control without sacrifice—because sometimes you want the pecan pie experience without committing to an entire slice. For those interested in more historical and expert perspectives, check out this comprehensive guide to pecan tassies by a professional pastry chef.
Why Pecan Tassies Are Ultimate Crowd-Pleasers

There's something magical about bite-sized desserts that makes people's eyes light up. Maybe it's the built-in portion control that makes us feel less guilty about reaching for a second (or third). Or perhaps it's the way they look like little jewels arranged on a platter, each one a perfect golden-brown promise of deliciousness.
Pecan tassies hit every mark for the ideal party dessert. They're elegant enough for holiday gatherings but casual enough for book club meetings. No plates required, no messy cutting, no awkward "is this piece too big?" moments. Just pick one up and enjoy pure, concentrated pecan pie bliss.
Holiday Hero Status
During the holiday season, pecan tassies become absolute superstars. They're like the Swiss Army knife of desserts—perfect for cookie exchanges, office parties, family gatherings, and gift boxes. Unlike traditional pecan pie that requires careful slicing and serving, tassies are grab-and-go gorgeous.
The best pecan tassies recipe shines during Christmas when you need something that travels well, looks impressive, and appeals to a crowd. They stack beautifully in gift tins, freeze like dreams for make-ahead entertaining, and somehow manage to feel both nostalgic and fresh at the same time. If you're looking for more inspiration for festive treats, you might also enjoy these bunny butt cookies for spring or Easter occasions.
Essential Ingredients for Perfect Tassies
The magic of a great pecan tassies recipe lies in the quality and balance of just a few key ingredients. Unlike some desserts that require a pantry raid, tassies keep things beautifully simple—but each ingredient plays a crucial role in the final result.
The Cream Cheese Pastry Foundation
The crust is where tassies truly differentiate themselves from other miniature desserts. This isn't your standard pastry—it's a tender, rich dough that gets its character from cream cheese. The cream cheese doesn't just add flavor; it creates a texture that's more forgiving than traditional pastry and infinitely more delicious.
You'll need cold unsalted butter (emphasis on cold—this isn't the time to rush), full-fat cream cheese at room temperature, all-purpose flour, and a pinch of salt. Some bakers add a touch of sugar to the dough, but it's not essential since the filling brings plenty of sweetness to the party.
The key to exceptional pastry is treating your butter right. Cold butter creates those lovely flaky layers as it melts during baking, creating steam pockets that give you that perfect tender-crisp texture. Room temperature cream cheese blends smoothly without overworking the dough—and overworked dough is tough dough.
The Pecan Filling Stars
The filling is where this old fashioned pecan tassie recipe really sings. Chopped pecans are the obvious star, but the supporting cast is equally important. Brown sugar brings deeper, more complex sweetness than granulated sugar—those molasses notes play beautifully with the nuttiness of the pecans.
Eggs provide structure and richness, while a touch of melted butter adds luxurious mouthfeel. Corn syrup might seem like an odd addition, but it's what gives the filling that characteristic gooey texture. If you prefer, maple syrup makes an excellent substitute and adds its own subtle flavor complexity.
Vanilla extract is non-negotiable—it bridges all the flavors and adds warmth that makes everything taste more like itself. A tiny pinch of salt in the filling enhances every other flavor and prevents the sweetness from becoming cloying.
Equipment That Makes the Difference

Having the right tools transforms this pecan tassies recipe easy from potentially frustrating to genuinely enjoyable. The good news? You don't need any specialized pastry equipment—just a few kitchen essentials and maybe one game-changing tool.
Mini Muffin Pan Perfection
A standard 24-cup mini muffin pan is your foundation for perfect tassies. Look for one with a light-colored finish—dark pans conduct heat more aggressively and can overbrown your delicate pastry before the filling sets properly. If you're investing in new equipment, choose a heavy-gauge pan that distributes heat evenly.
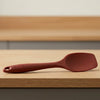
Here's where the right tools really shine: a silicone spatula that can handle both mixing duties and precise scraping becomes invaluable. When you're working with sticky dough and gooey filling, having a spatula that won't melt, won't scratch your bowls, and gives you complete control makes all the difference.
The DI ORO™ Seamless Silicone Spatula—winner of America's Test Kitchen's best all-purpose spatula award—excels at this kind of precision work. Its flexible edge gets every bit of filling from the bowl, while the sturdy construction means it won't bend when you're pressing dough into those tiny cups. Plus, it's made with pro-grade, forever-chemical-free silicone, so you're not introducing any unwanted compounds to your beautiful homemade treats.
Mixing and Measuring Essentials
Accurate measuring makes the difference between good tassies and great ones. Standard measuring cups and spoons are fine, but a kitchen scale elevates your consistency game significantly. Flour can vary dramatically in weight depending on how it's packed, but 4 ounces of flour is always 4 ounces of flour.
For mixing, you have options. A stand mixer makes quick work of creaming the cream cheese and butter, but a hand mixer or even vigorous whisking by hand will get you there. The goal is smooth, well-combined ingredients without overworking the dough.
A tart tamper—a small tool designed for pressing dough into mini tart pans—is incredibly helpful but not essential. Clean fingers or the back of a small spoon work perfectly well for shaping your pastry shells. The key is gentle, even pressure that creates uniform thickness without tearing the delicate dough.
Step-by-Step Pecan Tassies Recipe Instructions
Now comes the fun part—transforming those simple ingredients into something that'll have people asking for your recipe. This best pecan tassies recipe breaks down into manageable steps that even nervous bakers can master. The secret isn't complicated techniques; it's understanding why each step matters and giving yourself permission to take your time.
Preparing the Cream Cheese Dough
Start by combining 1 cup of all-purpose flour with a pinch of salt in a bowl—whisk them together so the salt distributes evenly. In a separate bowl, cream together 4 ounces of cold butter (cut into chunks) with 3 ounces of room-temperature cream cheese. This temperature difference isn't an accident; the cold butter creates flakiness while the soft cream cheese blends smoothly.
Beat them together until the mixture looks smooth and cohesive—about 2 minutes with an electric mixer or 3-4 minutes by hand. Don't worry if you see tiny specks of butter; they'll create lovely texture in the finished crust. Gradually add your flour mixture, mixing just until a soft dough forms. The moment it comes together, stop mixing. Overworked dough equals tough tassies.
Wrap the dough in plastic and chill for at least 30 minutes, though an hour is even better. This rest period allows the flour to hydrate fully and the butter to firm up, making the dough much easier to handle. Cold dough also holds its shape better during baking, giving you those crisp, defined shells.
Forming Perfect Tassie Shells
Remove your chilled dough and divide it into 24 equal portions—each about the size of a rounded teaspoon. Roll each portion into a smooth ball between your palms. This is where patience pays off; taking time to make uniform balls ensures even baking and professional-looking results.
Place each dough ball into a mini muffin cup and press it up the sides to form a shell. Use your thumbs to press the bottom flat, then work the dough up the sides, aiming for even thickness throughout. The shells should come nearly to the top of each cup but not overflow onto the rim.
Here's a pro tip that makes all the difference: after shaping your shells, pop the entire pan into the freezer for 10-15 minutes. This firms up the butter again and helps the shells hold their shape during baking instead of slumping down into sad little pancakes.
Creating the Pecan Filling
While your shells chill, prepare the filling that makes this pecan tassies recipe easy but impressive. In a bowl, whisk together 1 egg, 3/4 cup packed brown sugar, 1 tablespoon melted butter, 1 tablespoon corn syrup (or maple syrup), 1 teaspoon vanilla extract, and a pinch of salt until smooth and well combined.
The mixture should look glossy and cohesive—no streaks of egg white or pockets of unmixed sugar. This is where a quality silicone spatula really shines, allowing you to scrape the bowl thoroughly and ensure everything is perfectly incorporated. Stir in 3/4 cup of chopped pecans, making sure they're evenly distributed throughout the mixture.
Some bakers prefer to place a few pecan pieces in the bottom of each shell before adding the filling—this ensures every tassie gets its fair share of nuts and creates an attractive presentation when you bite into them.
Assembly and Baking Perfection
Preheat your oven to 350°F while you assemble your tassies. Remove the shells from the freezer and fill each one with the pecan mixture, filling them about 3/4 full. The filling will puff slightly during baking, so don't overfill or you'll have a sticky mess to clean up.
A small spoon works well for portioning the filling, but here's where that versatile silicone spatula becomes invaluable again. Its precise edge lets you scrape every bit of filling from the bowl and distribute it evenly among the shells without waste.
Bake for 20-25 minutes, until the filling is set and the pastry edges are golden brown. The centers should look just slightly jiggly when you gently shake the pan—they'll continue cooking from residual heat as they cool. Overbaked tassies become tough and lose that perfect gooey center that makes them irresistible.
Storage and Make-Ahead Strategies

One of the greatest advantages of this old fashioned pecan tassie recipe is how beautifully they store and travel. These little gems actually improve slightly after a day, as the flavors meld and the filling settles into perfect harmony with the crust.
Proper Storage Techniques
Once completely cooled, store your tassies in an airtight container at room temperature for up to three days. Layer them between sheets of parchment paper to prevent sticking—though honestly, they rarely last long enough for storage to become an issue.
For longer storage, these freeze beautifully for up to three months. Arrange them in a single layer on a baking sheet and freeze until solid, then transfer to freezer-safe containers with parchment between layers. Thaw at room temperature for about 30 minutes before serving, and they'll taste just as fresh as the day you made them.
Make-Ahead Magic
This pecan tassies recipe easy approach extends to advance preparation. You can make the dough up to two days ahead and keep it wrapped in the refrigerator. The filling can also be prepared a day in advance and stored covered in the fridge—just give it a good stir before using.
For ultimate convenience, shape the shells in your mini muffin pan, cover tightly with plastic wrap, and refrigerate overnight. Fill and bake the next day for fresh-from-the-oven results with minimal last-minute effort. This strategy is perfect for holiday entertaining when oven space and time are at a premium.
Creative Variations and Serving Ideas
While the classic pecan tassies recipe is perfection in its simplicity, these little shells are incredibly versatile canvases for your creativity. Once you've mastered the basic technique, the variations are limited only by your imagination.
Flavor Variations
Swap the corn syrup for pure maple syrup to add subtle complexity and a hint of autumn warmth. Bourbon lovers can add a teaspoon of their favorite whiskey to the filling for grown-up sophistication. A pinch of cinnamon or a few drops of almond extract can transform the flavor profile entirely.
For chocolate enthusiasts, fold mini chocolate chips into the filling or drizzle cooled tassies with melted dark chocolate. Dried cranberries or chopped dates add chewy texture and tart contrast to the sweet filling. Walnuts or toasted hazelnuts can replace pecans for different nutty profiles.
The beauty of this best pecan tassies recipe lies in its adaptability—the basic proportions remain the same while you experiment with flavors that speak to your taste preferences and seasonal inspirations. For more creative dessert ideas, you might also love this blue monster ice cream or the popular banana pudding brownies for your next gathering.
Presentation and Serving Suggestions
These bite-sized beauties shine brightest when served at room temperature, allowing their flavors to fully bloom. Arrange them on a tiered serving stand for elegant holiday presentations, or nestle them in decorative paper cups for casual gatherings. A light dusting of powdered sugar adds a touch of sophistication, while a small dollop of freshly whipped cream transforms them into restaurant-worthy desserts.
For gift-giving, pack cooled tassies in decorative tins lined with parchment paper. They travel exceptionally well and make thoughtful hostess gifts or holiday treats for neighbors. Consider creating a dessert sampler by pairing different variations—classic pecan alongside bourbon-spiked versions or chocolate-drizzled alternatives. If you’re looking to upgrade your entire baking setup, the DI ORO best sellers collection features versatile kitchen tools that can streamline your holiday baking prep.
Troubleshooting Common Pecan Tassie Challenges

Even with the most carefully followed pecan tassies recipe, occasional hiccups happen. Understanding how to identify and fix common issues will boost your confidence and ensure consistent results every time you bake. For additional expert troubleshooting and baking science, you can reference this authoritative pecan tassie guide.
Preventing Soggy Bottoms
Nobody wants a soggy-bottomed tassie ruining their perfect bite. This issue typically stems from underbaking or overfilling the shells. Ensure your oven temperature is accurate with an oven thermometer—many home ovens run cooler than their settings indicate. The pastry should be golden brown and the filling should be set but still slightly jiggly in the center when done.
If you notice consistent sogginess, try baking the empty shells for 5 minutes before adding the filling. This pre-baking creates a moisture barrier that keeps the crust crisp. Also, avoid making the filling too far in advance, as excess liquid can separate and create soggy conditions.
Fixing Cracked or Overflowing Filling
Cracked filling usually indicates overbaking or too high an oven temperature. Lower your temperature by 25 degrees and extend the baking time slightly. Overflowing typically results from overfilling the shells—remember that the filling expands during baking, so three-quarters full is your target.
If overflow does occur, use a sharp knife to trim away the excess while the tassies are still warm but not hot. This old fashioned pecan tassie recipe approach of gentle handling prevents damage to the delicate shells while maintaining clean presentation.
Frequently Asked Pecan Tassie Questions
Can I Use Different Pan Sizes?
While mini muffin pans create the classic tassie size, you can adapt this best pecan tassies recipe to regular muffin tins for larger portions. Increase the baking time to 25-30 minutes and adjust ingredient quantities proportionally—you'll get about 12 larger tassies instead of 24 mini ones.
Tartlet pans with removable bottoms also work beautifully and create more elegant presentations for special occasions. The key is maintaining the proper dough-to-filling ratio regardless of pan size. If you're looking for even more baking versatility, explore the Seamless Series kitchen tools for professional results in your home kitchen.
What If My Dough Is Too Sticky?
Sticky dough usually means the butter was too warm when you started, or the kitchen temperature is particularly hot. Pop the dough back into the refrigerator for another 30 minutes, or even freeze it briefly until it firms up enough to handle comfortably.
Lightly flouring your hands can help when shaping the dough balls, but avoid adding extra flour to the dough itself, which can make the finished crust tough. Patience and proper chilling solve most handling issues with this pecan tassies recipe easy method. For more tips on precise measuring and consistent results, check out this glass measuring cup guide to ensure your ingredient accuracy every time.
How Do I Remove Stuck Tassies?
Prevention is the best cure—lightly grease your mini muffin pan even if it's non-stick, or use paper liners for foolproof removal. If tassies do stick, let them cool completely, then run a thin knife around the edges and gently twist each one to release it.
A quality silicone spatula with a thin, flexible edge can help coax stubborn tassies from their cups without breaking the delicate shells. Work slowly and patiently—rushing leads to broken tassies and frustrated bakers.
Elevating Your Pecan Tassie Game
Professional Finishing Touches
Transform your homemade tassies into bakery-worthy treats with simple finishing techniques. A light brush of corn syrup mixed with a tablespoon of water creates a glossy, professional-looking glaze. Apply this mixture while the tassies are still slightly warm for best adhesion.
Toasted pecan halves pressed gently into the center of each tassie before baking create visual appeal and guarantee every bite includes nuts. For special occasions, a drizzle of caramel sauce or a sprinkle of flaky sea salt adds gourmet flair that'll have guests convinced you're a pastry chef in disguise. For advanced tips and new flavor ideas, explore this MasterClass pecan tassies recipe from professional chefs.
Seasonal Adaptations
This versatile pecan tassies recipe southern living style adapts beautifully to seasonal celebrations. Add orange zest and dried cranberries for Thanksgiving, incorporate peppermint extract and crushed candy canes for Christmas, or fold in lemon zest and fresh berries for spring gatherings.
Summer versions can feature toasted coconut and lime zest, while autumn calls for warm spices like cinnamon, nutmeg, and a touch of cardamom. The basic technique remains constant while the flavors dance with the seasons, ensuring your tassie repertoire never grows stale.
Mastering the Art of Pecan Tassies
Creating perfect pecan tassies isn't about complicated techniques or fancy equipment—it's about understanding the fundamentals and giving yourself permission to practice. This pecan tassies recipe delivers consistent results because it respects the science behind good baking while remaining approachable for home cooks of all skill levels.
Whether you're preparing for holiday entertaining, contributing to a potluck, or simply satisfying a craving for something sweet and nutty, these miniature masterpieces deliver maximum impact with minimal fuss. Master this recipe, and you'll have a go-to dessert that never fails to impress, travels beautifully, and disappears faster than you can say "just one more." Your kitchen confidence will soar along with your reputation as the friend who always brings the good stuff.
Frequently Asked Questions
How long can you keep pecan tassies?
Pecan tassies can be stored at room temperature for up to 3 days when kept in an airtight container. For longer freshness, refrigerate them for up to a week. If you want to enjoy them even later, freeze the tassies for up to 3 months and thaw before serving.
What is the secret ingredient in pecan pie?
The secret ingredient in pecan pie often lies in the combination of corn syrup and brown sugar, which gives the filling its signature gooey, rich texture and deep caramel flavor. Some bakers also add a touch of bourbon or vanilla extract to elevate the complexity and depth of the pie's taste.
Why do my pecan tassies stick to the pan?
Pecan tassies may stick to the pan if it's not properly greased or if the pan lacks a non-stick coating. Using a high-quality non-stick mini muffin pan or generously buttering each cup before filling can prevent sticking. Also, allowing the tassies to cool completely before removing helps them set and release more easily.
What is a tassie dessert?
A tassie dessert is a small, bite-sized tart typically filled with sweet, creamy fillings like pecan pie or cheesecake mixtures. Originating from the southern United States, tassies combine a tender pastry shell with rich fillings, making them perfect for parties or holiday treats.
Do pecans expire?
Yes, pecans can expire, especially if stored improperly. Fresh pecans typically last about 6 months in the pantry but can stay fresh for up to 2 years if refrigerated or frozen. Always check for a rancid smell or bitter taste, which indicates they’ve gone bad.


