Cooking Stainless Steel: 10 Easy Tips for Perfect Results 2026
The Secret Affair Between Stainless Steel and Your Kitchen Masterpieces
Let's be honest— that gleaming stainless steel pan sitting in your kitchen isn't just cookware. It's a canvas. A culinary partner-in-crime. The silent hero behind your most impressive dinner party triumphs and midnight cooking experiments. Yet for many home chefs, cooking with stainless steel feels like navigating a complicated relationship status: "It's delicious... it's stuck... it's burned... it's PERFECT!"
I get it. I've been there—watching in horror as my carefully seasoned chicken thighs transformed into a stubborn, stuck-on mess. But here's the truth: stainless steel isn't temperamental; it's misunderstood. And once you crack the code, you'll wonder how you ever lived without it.
At DI ORO, we believe great cooking starts with understanding your tools. That gleaming stainless surface isn't just pretty—it's telling you secrets about temperature, timing, and technique. All you need to do is learn how to listen.
Why Stainless Steel Deserves the Starring Role in Your Kitchen

Before we dive into the "how," let's talk about the "why." Cooking with stainless steel isn't just a preference—it's a culinary upgrade that professional chefs have sworn by for generations. Unlike its trendy, color-coated cousins, stainless steel cookware isn't just passing through—it's moving in for life.
The Magnificent Science Behind the Shine
That gorgeous pan isn't just a pretty face. Quality stainless steel cookware is typically built with a three-ply or five-ply construction—stainless steel layers hugging an aluminum or copper core. This clever sandwich design gives you the best of all worlds: the durability and non-reactivity of stainless steel with the superior heat conductivity of aluminum or copper. It's like having an engineering degree built into your cookware.
This construction means your pan heats evenly, without those annoying hot spots that turn one pancake golden and another into a sad, pale disc. The stainless exterior also means your food's flavors stay pure—no metallic taste, no chemical leaching, just the clean expression of your ingredients.
Stainless Steel vs. Nonstick: The Epic Showdown
Let's address the elephant in the kitchen—cooking with stainless steel versus nonstick. Sure, that nonstick pan makes flipping eggs look like child's play. But it's the culinary equivalent of training wheels—helpful at first, but limiting your potential in the long run.
When cooking with stainless steel, you're developing crucial skills and unlocking flavors that nonstick simply can't deliver. That beautiful browning? The rich fond that transforms into a velvety pan sauce? The ability to go from stovetop to oven without a second thought? That's the stainless steel advantage.
Plus, while nonstick surfaces inevitably wear down (taking your hard-earned money with them), a quality stainless steel pan can literally last generations. My grandmother's stainless steel skillet has seen everything from Depression-era simple suppers to modern molecular gastronomy experiments—and it's still going strong.
Mastering the Preheating Dance: The Secret to Stick-Free Cooking
If there's one thing that separates stainless steel novices from masters, it's this: patience in preheating. Rushing this step is like skipping foreplay—technically you can, but why would you when the results are so much better when you don't?
The Water Droplet Test: Your New Best Friend
Here's the game-changer for cooking with stainless steel without sticking: the Mercury Ball Test. Heat your dry pan over medium heat for 2-3 minutes, then flick a few droplets of water onto the surface. If they sizzle and evaporate immediately, your pan is too hot. If they just sit there, it's too cool. But if they form perfect little balls that dance across the surface like tiny mercury globes? That's the sweet spot.
This phenomenon, known as the Leidenfrost effect, creates a vapor barrier between your food and the pan—nature's original nonstick surface. Once you see those dancing water droplets, add your oil, give it a moment to heat (but not smoke), and then add your food. The difference is nothing short of magical.
Temperature Control: Finding Your Pan's Happy Place
Contrary to popular belief, cooking with stainless steel doesn't mean cranking the heat. In fact, medium heat is your friend for most applications. Stainless steel retains heat beautifully, which means once it's hot, it stays hot. Blast it with high heat and you're likely to get that dreaded sticking situation.
Think of it like getting to know a new dance partner—start slow, be responsive, and adjust as you go. Your pan will tell you what it needs if you pay attention to the signs.
The Cold Food Fallacy: Why Room Temperature Matters

Picture this: You've perfectly preheated your stainless steel pan, added the right amount of oil, and then... you throw in ice-cold chicken straight from the refrigerator. Suddenly, your pan temperature plummets, the proteins seize up, and you're scraping chicken off the bottom of your pan while questioning your life choices.
The solution is simple but often overlooked: let your proteins come to room temperature before cooking. This 20-30 minute rest does two crucial things: it allows for more even cooking (goodbye, overdone edges and raw centers), and it prevents that dramatic temperature drop that leads to sticking.
This is especially important when cooking with stainless steel pans, where temperature management is everything. A room-temperature steak hitting a properly preheated pan is the difference between a gorgeous crust that releases naturally and a sticky, torn mess.
The Pat-Dry Principle: Moisture Is the Enemy
While we're talking temperature, let's address moisture—the silent saboteur of perfectly seared food. Before your ingredients hit that beautiful stainless steel surface, they should be thoroughly patted dry with paper towels. Every. Single. Time.
Why? Physics! When moisture hits a hot pan, it creates steam. Steam prevents browning and proper searing. It's that simple. Take the extra 30 seconds to pat your chicken, steak, or fish dry, and you'll be rewarded with restaurant-quality results.
The "Leave It Alone" Method: Patience Rewards the Bold
The single biggest mistake people make when cooking with stainless steel? Premature flipping. We get it—you're anxious, you want to peek, you're worried about burning. But here's the truth: food that's properly searing will release from the pan when it's ready—and not a moment sooner.
When you place that seasoned chicken thigh skin-side down in your preheated pan, it will initially stick. This is normal! This is good! This is the proteins creating a bond with the metal surface. But as those proteins cook and form a crust, they'll naturally release. Try to flip too early, and you'll tear the food and leave half of it stuck to the pan.
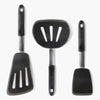
Instead, practice what I call the "gentle nudge test." After a few minutes (depending on what you're cooking), gently slide your DI ORO spatula under the edge of the food. If it lifts easily, it's ready to flip. If there's resistance, give it more time. This isn't just technique—it's a cooking philosophy: trust the process.
The First-Side Advantage: 70/30 Cooking
Here's a pro tip that will transform your stainless steel cooking game: spend 70% of your total cooking time on the first side, and just 30% after flipping. This approach gives you that beautiful initial sear while ensuring you don't overcook after turning.
For a 1-inch thick steak cooked to medium-rare, that might mean 5-6 minutes on the first side, but only 2-3 minutes after flipping. This method works beautifully when cooking with stainless steel pans because they retain and distribute heat so efficiently.
Essential Cooking Techniques for Stainless Steel

Ready to transform that gleaming stainless steel pan from a kitchen showpiece into your culinary secret weapon? Let's dive into the techniques that will have you cooking with confidence and flair. Your relationship status with stainless steel is about to change from "it's complicated" to "happily committed."
Searing Meats to Perfection: The Crust Chronicles
There's nothing quite like the sizzle of a steak hitting a properly preheated stainless steel pan. That sound? It's the promise of flavor—deep, complex, and utterly satisfying. The key to achieving that restaurant-worthy sear lies in preparation and patience.
First, ensure your protein is thoroughly patted dry—moisture is the enemy of a beautiful crust. Season generously with salt and pepper right before cooking (salt too early and you'll draw out moisture). Then, follow your preheating ritual religiously. When those water droplets dance across the surface like tiny ballerinas, add just enough high smoke-point oil to coat the pan with a shimmering layer.
Place your meat in the pan and—here's where the magic happens—don't touch it. Seriously. Put down that spatula, step away from the stove, maybe pour yourself a glass of wine. The proteins need time to form that gorgeous brown crust that will eventually release naturally from the pan. Trying to flip too soon is like interrupting someone during a great story—nobody wins.
When the meat is ready to flip, it will tell you. Give it a gentle nudge with your DI ORO spatula—if it moves freely, it's ready. If it resists, give it more time. This isn't just technique; it's a relationship built on trust.
Mastering Delicate Foods: Yes, You Can Cook Eggs in Stainless Steel
I know what you're thinking: "Eggs in stainless steel? Are you trying to ruin my morning?" But trust me—cooking eggs in stainless steel isn't just possible; it's downright delightful once you know the secrets.
The trick with delicate proteins like eggs is temperature control. Unlike searing meat, eggs demand a gentler approach. Start with a thoroughly clean pan (old food residue is a sticking hazard) and preheat it over medium-low heat. The water droplet test still applies, but you're looking for a slower dance from those droplets.
Once preheated, add a generous amount of butter (this is not the time to skimp). Let it melt completely and begin to foam slightly, but don't let it brown. The foam indicates that the water content has evaporated, leaving behind pure butterfat—nature's original non-stick coating.
Only then should your eggs meet the pan. Keep the heat moderate, and give them time to set before attempting to flip or scramble. For fried eggs, a cover can help the tops set without having to flip at all—a nifty trick for those still building their confidence.
The Art of Deglazing: Turning "Mistakes" into Masterpieces
Here's where cooking with stainless steel truly shines over non-stick—those browned bits stuck to the bottom of your pan aren't failures; they're flavor gold mines waiting to be transformed into magnificent sauces.
After searing meat or sautéing vegetables, you'll notice a brown layer clinging to the pan. This is fond—the French term for the concentrated flavor compounds that develop during cooking. In the culinary world, this isn't a cleaning problem; it's an opportunity for greatness.
With your pan still hot and the fond intact, pour in a liquid—wine, stock, even water will work in a pinch. The sizzle and steam that erupts is actually dissolving those flavor bombs back into your sauce. Use your DI ORO spatula to scrape gently, helping the process along.
Let this liquid reduce by half, then finish with a pat of cold butter for richness and shine. Congratulations—you've just created a restaurant-quality pan sauce that would make professional chefs nod in approval. And it all happened because you chose stainless steel.
Tackling Specific Foods with Stainless Steel
Different ingredients demand different approaches when cooking with stainless steel. Let's break down how to handle the most common culinary suspects.
Vegetables: From Crisp-Tender to Caramelized
Vegetables are perhaps the most forgiving foods to cook in stainless steel, making them perfect for beginners. The key is matching your technique to your desired outcome.
For a quick sauté with crisp-tender results, preheat your pan over medium-high heat, add a splash of oil, and keep those veggies moving. A DI ORO spatula with its flexible edge makes tossing a breeze without scratching your precious pan. For denser vegetables like carrots or Brussels sprouts, add a splash of water and cover briefly to steam-finish them after the initial sear.
Seeking deep caramelization? Patience becomes your virtue. Spread your vegetables in a single layer, season with salt (which helps draw out moisture), and resist the urge to stir constantly. Let them develop color on one side before flipping. Those browned edges aren't just pretty—they're flavor multipliers.
Fish: Conquering the Ultimate Sticking Challenge
Fish has a reputation as the final boss of stainless steel cooking, but with the right approach, you'll nail it every time. The secret lies in surface preparation—both the pan's and the fish's.
Start with fish that's completely dry (pat it with paper towels until no moisture remains) and at room temperature. Season the skin side with salt just before cooking to draw out the last bits of moisture. Meanwhile, preheat your pan thoroughly using the water droplet test.
Here's the game-changer: once your pan is properly heated, add oil, then immediately place the fish skin-side down and—this is crucial—press gently with a flexible spatula for the first 10 seconds. This ensures complete contact between skin and pan, preventing curling and promoting even cooking.
Cook the fish 90% of the way on the skin side (you'll see the flesh changing color from the bottom up). When it's time to flip, slide your thin DI ORO spatula completely under the fish before attempting to turn it. The skin should release cleanly, rewarding you with a crispy, golden result that would make any seafood restaurant proud.
Sauces and Reductions: Stainless Steel's Secret Superpower
While non-stick pans falter when it comes to reduction sauces, stainless steel excels magnificently. The light-colored surface lets you monitor color changes precisely, while the excellent heat distribution prevents scorching.
For tomato-based sauces, stainless steel's non-reactive surface means no metallic taste—just pure, vibrant flavor. Start with a cold pan when building a sauce from aromatics like onions and garlic. This allows them to release their flavors gradually without burning.
When reducing liquids, maintain a gentle simmer rather than a rolling boil. This prevents spattering and allows for more controlled evaporation. Keep your sauce moving occasionally with a silicone spatula to prevent a skin from forming on top.
For the smoothest, silkiest results, finish your sauce with the "mounting" technique—whisk in cold butter pieces one at a time with the pan off the heat. The butter emulsifies into the sauce, creating a velvety texture that clings beautifully to your food.
Troubleshooting Common Stainless Steel Cooking Issues

Even seasoned chefs occasionally hit bumps when cooking with stainless steel. Let's tackle the most common challenges head-on.
When Food Sticks: The Rescue Plan
It happens to everyone—you follow the rules, but something still sticks. Don't panic! First, resist the urge to crank up the heat or force the food free. Instead, add a splash of liquid (wine, stock, or water) to the pan and cover it for a minute. The steam created will help release the stuck food naturally.
If you're mid-cook and can't deglaze yet, try this pro move: lower the heat slightly and let the pan cool just a bit. Often, the contraction of the metal as it cools will help release the food. A gentle nudge with your spatula after this cooling period often works wonders.
Remember that some sticking is actually desirable when building flavors—those stuck bits will become the foundation of your pan sauce. The difference between "good sticking" and "bad sticking" is whether the food releases intact when it's ready.
Managing Heat Fluctuations
Stainless steel's excellent heat retention can sometimes work against you if you're not prepared. If your pan gets too hot, don't just turn down the heat—the pan will stay hot for quite some time. Instead, lift it completely off the burner for 15-30 seconds to cool it down quickly.
For dishes requiring precise temperature control, keep a second burner preheated at a lower setting. This allows you to quickly move your pan to a gentler heat when needed—a technique professional chefs use constantly.
When adding cold ingredients to a hot pan, try to add them in small batches rather than all at once. This prevents the dramatic temperature drop that can lead to uneven cooking and sticking. For larger pieces of meat, this might mean searing in batches rather than crowding the pan.
Banishing the Rainbow: Dealing with Discoloration
Sometimes your beautiful stainless steel develops heat marks or rainbow patterns after cooking. This discoloration is harmless but can be unsightly. To restore your pan's shine, make a paste with baking soda and water, apply it to the discolored areas, and gently rub with a soft cloth.
For stubborn rainbow stains, white vinegar works like magic—simply soak a cloth in vinegar and wipe the affected areas. The acid breaks down the thin layer of oxidation causing the discoloration. Finish by rinsing thoroughly and drying completely to prevent water spots.
Remember that these cosmetic issues don't affect your pan's performance—they're simply part of cooking with stainless steel. Many chefs even consider them badges of honor, signs of a well-used and well-loved tool.
Caring for Your Stainless Steel: Maintenance That Matters
Let's talk relationship maintenance—between you and your stainless steel, that is. Like any worthwhile partnership, a little care goes a long way. With the right attention, your stainless steel cookware will remain your kitchen MVP for decades, not just seasons.
Cleaning Rituals: Beyond the Basic Scrub
The post-cooking cleanup doesn't have to be a chore when you know the tricks. For everyday cleaning, warm soapy water and a soft sponge will handle most messes. But when faced with stubborn residue, resist reaching for the steel wool—your future self will thank you for preserving that pristine surface.
Instead, try the hot pan method: while your pan is still warm (not scorching), add a splash of water and return it to low heat. As the water simmers, those stuck-on bits will loosen their grip. Now your DI ORO spatula becomes your cleaning ally—its flexible edge can gently scrape away residue without scratching. This technique transforms cleaning from a battle into a satisfying finale to your cooking performance.
For those truly stubborn situations, create a paste with baking soda and water, apply it to problem areas, and let it sit for 15-20 minutes before scrubbing gently. It's like a spa treatment for your pan—effective yet gentle. Barkeeper's Friend is another excellent option that chefs swear by for maintaining that signature stainless steel shine.
Removing Stubborn Stains and Buildup
Even the most attentive cooks occasionally encounter mineral deposits or heat stains on their stainless steel. Think of these as character marks rather than flaws—but if they bother you, they're easily remedied. For those cloudy white water spots, a solution of equal parts white vinegar and water will dissolve mineral deposits like magic.
Heat discoloration—those rainbow patterns that appear after high-heat cooking—can be banished with a vinegar soak followed by a gentle polish with olive oil. For cooked-on oil residue that creates a brownish tinge, try heating equal parts water and vinegar in the pan itself, then cooling and washing normally. The slight acidity breaks down the polymerized oil without damaging your cookware.
Remember that these cosmetic issues don't affect cooking performance—they're simply evidence of your culinary adventures. Many professional chefs actually prefer the look of well-used stainless steel, seeing beauty in its subtle patina rather than factory-fresh perfection.
Storage Strategies for Longevity
How you store your stainless steel cookware can significantly impact its lifespan. Nesting pans directly against each other creates scratches over time, so consider using pan protectors between pieces. These simple fabric dividers are inexpensive but can preserve your investment for years.
If cabinet space allows, hanging your stainless steel pieces isn't just a stylish display option—it's practical protection. Wall-mounted racks or ceiling hooks keep your cookware accessible while preventing contact damage. Plus, there's something undeniably satisfying about the professional kitchen aesthetic of hanging pots and pans.
Always ensure your cookware is completely dry before storing to prevent water spots and potential discoloration. A final buff with a soft microfiber cloth not only removes lingering moisture but also gives your stainless steel that eye-catching gleam that makes it a showpiece even when not in use.
Cooking with Stainless Steel vs. Non-Stick: The Great Debate
Let's address the elephant in the kitchen: why choose stainless steel when non-stick seems so convenient? This isn't about declaring a winner but understanding when each option truly shines. Spoiler alert: there's room in your kitchen for both, but stainless steel deserves the prime position.
When Stainless Steel Outperforms Non-Stick
Stainless steel absolutely dominates in high-heat cooking scenarios. Want that perfect crust on your steak or deep caramelization on vegetables? Stainless steel can handle temperatures that would destroy non-stick coatings, which typically begin degrading above 500°F. That means searing, browning, and creating fond for sauces are all firmly in stainless steel territory.
Acidic foods like tomato sauces, wine reductions, and citrus-based dishes are also best prepared in stainless steel. The non-reactive surface ensures no metallic taste transfers to your food, and you won't damage the pan in the process. Try simmering a tomato sauce for hours in an aluminum pan, and you'll quickly understand why professionals choose stainless steel.
Perhaps most importantly, stainless steel creates flavors that non-stick simply can't match. Those browned bits that stick to the pan? They're concentrated flavor compounds developing through the Maillard reaction—the chemical process that transforms proteins and sugars into hundreds of new flavor molecules. Non-stick prevents this development, essentially robbing your food of potential depth and complexity.
Health and Safety Considerations
When it comes to what touches your food, stainless steel offers unparalleled peace of mind. Unlike some cookware that can leach chemicals or metals into food, quality stainless steel is essentially inert. There's no coating to scratch off, no chemicals to worry about, and no degradation over time that might compromise food safety.
This matters particularly when cooking for family. While many non-stick pans have become safer in recent years, stainless steel eliminates concerns about potential chemical exposure completely. At DI ORO, we take this seriously—it's why our silicone tools are forever-chemical free. We believe what touches your food matters, whether it's your spatula or your cooking surface.
From an environmental perspective, stainless steel's incredible durability means fewer pans in landfills over your lifetime. While non-stick pans typically need replacement every few years as their coatings wear, a quality stainless steel pan can literally last generations. That's not just good for your wallet—it's better for our planet.
Learn more about stainless steel cookware safety and benefits at Caraway Home's blog and discover comparisons with other cookware types at NutritionFacts.org.
Mastering Stainless Steel: Your Culinary Journey
Cooking with stainless steel isn't just about technique—it's about developing an intuition that transforms challenging into rewarding. As you practice these methods, you'll find yourself relying less on strict rules and more on your senses. You'll hear when the sizzle is just right, see when the oil is perfectly heated, and feel when the pan has reached ideal temperature.
Building Confidence Through Practice
The path to stainless steel mastery isn't about perfection—it's about progress. Start with forgiving foods like vegetables and hearty cuts of meat before attempting delicate fish or eggs. Each cooking session builds your confidence and expands your capabilities. Soon, you'll find yourself tackling recipes you once thought required non-stick with absolute assurance.
Document your successes (and yes, even your failures). Notice what works and what doesn't. Was the pan not quite hot enough? Did you flip too soon? This mindful approach accelerates your learning curve dramatically. Remember that even professional chefs had to start somewhere—that perfectly executed omelet in a stainless steel pan didn't happen on their first try either.
Invite feedback from those enjoying your creations. Sometimes the proof is in the eating, not just the cooking. When your family raves about how your pork chops have never tasted better, you'll know that extra sear from your stainless steel pan made all the difference.
The Joy of Cooking Without Limitations
Perhaps the greatest reward of mastering stainless steel is the culinary freedom it provides. No more worrying about metal utensils scratching coatings. No more limiting yourself to medium heat. No more replacing pans every couple of years. Stainless steel liberates you to cook without compromise—to follow your culinary curiosity wherever it leads.
This freedom extends to creativity as well. The fond-based sauces you'll create become signature elements of your cooking style. The perfect sear on proteins elevates simple ingredients to restaurant quality. The even cooking of vegetables preserves both texture and nutrition. These aren't just techniques—they're expressions of your growing culinary voice.
And there's an undeniable satisfaction in mastering something that initially seemed challenging. Each successful dish cooked in your stainless steel pan becomes not just a meal but an achievement—tangible proof of your growing skills and confidence in the kitchen.
From Novice to Natural: Your Stainless Steel Evolution
As you continue your journey with stainless steel cookware, you'll notice a fascinating transformation. What once required careful attention becomes second nature. Preheating, adding oil at the right moment, knowing when to flip—these actions become as automatic as breathing. You're no longer following a method; you're expressing your culinary intuition.
This evolution happens gradually but unmistakably. One day, you'll realize you haven't had food stick in weeks. You'll notice you're creating pan sauces without even consulting recipes. You'll find yourself reaching for your stainless steel pan first, not as a challenge but as your trusted partner in culinary creation.
At DI ORO, we believe cooking should be joyful, not frustrating. That's why we design tools that complement your growing skills—spatulas and utensils that work harmoniously with quality cookware like stainless steel. As you master these techniques, our tools are there to support your journey, making each flip, stir, and scrape a pleasure rather than a challenge.
So embrace your stainless steel cookware with confidence. The learning curve is real but temporary, while the benefits—exceptional flavor, unmatched durability, and pure cooking satisfaction—last a lifetime. Your future dishes (and the lucky people who get to eat them) will thank you for making the leap from "good enough" to truly exceptional cooking. After all, in the kitchen as in life, it's often the initially challenging paths that lead to the most rewarding destinations.
For a deeper dive into the pros and cons of stainless steel cookware, check out this comprehensive guide at LeafScore.
Looking to up your breakfast game using your stainless steel skills? Try starting your day with a delicious sourdough starter recipe that pairs perfectly with a hearty pan-seared meal.
For a sweet finish, don't miss our Strawberry Cheesecake Ice Cream—a dessert that highlights the versatility of stainless steel cookware in preparing custards and reductions.
If you're a fan of Italian classics, learn how Ravioli Carbonara can benefit from proper pan techniques for a creamy, restaurant-quality finish.
Craving a comforting drink after all your kitchen adventures? Master the art of cozy beverages with this Chai Tea Latte recipe—perfect for sipping while your pans cool down.
Take your sandwich game up a notch with a perfectly-prepared steak sandwich recipe—where mastering the stainless steel sear makes all the difference.
Want to explore more kitchen tools that pair well with stainless steel? Discover the benefits of a quality zester tool for zesting citrus right into your pan sauces.
Upgrade your prep work with efficient kitchen scissors—the perfect companion for trimming proteins before they hit your stainless steel cookware.
For even more inspiration and tips on enhancing your culinary skills, explore all our kitchen blog articles and discover new recipes, tools, and techniques.
Explore Our Collections
Looking for thoughtful kitchen gift ideas? Whether you’re shopping for a home chef, a culinary student, or simply treating yourself, DI ORO’s curated gift ideas collection features premium tools that combine performance and elegance—perfect for any occasion.
Frequently Asked Questions
What foods should not be cooked in stainless steel?
Highly acidic foods like tomatoes, vinegar-based sauces, or citrus can sometimes react with stainless steel, causing a metallic taste or minor discoloration. Additionally, very salty dishes left to sit in stainless steel for prolonged periods might lead to pitting corrosion. To avoid any issues, it's best to cook acidic or salty foods quickly and clean the cookware promptly afterward.
What is the trick to cooking with stainless steel?
The key to cooking with stainless steel is preheating your pan properly and adding enough oil to create a natural non-stick surface. When the pan and oil are hot enough, food will release easily without sticking. Also, avoid overcrowding the pan, as this can cause temperature drops and food sticking.
Is it healthier to cook with stainless steel?
Stainless steel is considered a safe and healthy cooking option because it doesn’t leach harmful chemicals into food under normal cooking conditions. It’s non-reactive when used properly and doesn’t have coatings that can degrade over time. This makes it a popular choice for those looking for durable, non-toxic cookware.
What are the disadvantages of cooking with stainless steel?
One downside of stainless steel is that it can cause food to stick if not used correctly, which can be frustrating for beginners. It also tends to have uneven heat distribution compared to materials like cast iron or aluminum unless it has an aluminum or copper core. Additionally, stainless steel cookware can be heavier and more expensive than some alternatives.
Does stainless steel release toxins when heated?
Stainless steel is generally very stable and does not release toxins when heated during typical cooking. However, very high temperatures or damaged cookware might cause trace amounts of nickel or chromium to leach, but these levels are typically well within safe limits for most people. Choosing high-quality stainless steel and maintaining your cookware helps minimize any risk.
What is the healthiest cookware?
The healthiest cookware options are those that don’t leach harmful chemicals and are durable, such as stainless steel, cast iron, and ceramic. Cast iron adds beneficial iron to food, while ceramic offers a non-toxic, non-stick surface without synthetic coatings. Ultimately, the healthiest choice depends on your cooking style and how you maintain your cookware.

Please upload banner from store admin blog pages