Classic Baked Rigatoni Recipe: 3 Essential Techniques
The Art of Baked Rigatoni: Where Comfort Meets Culinary Creativity
There's something magical about pulling a bubbling tray of baked rigatoni from the oven. That moment when the cheese stretches into golden threads, the sauce simmers around perfectly cooked pasta tubes, and the kitchen fills with an aroma that practically demands everyone gather around the table. It's not just dinner—it's an event.
At DI ORO, we believe the best dishes balance tradition with personal flair, and few recipes embody this philosophy better than a classic baked rigatoni. Whether you're a weeknight warrior trying to please picky eaters or a weekend chef looking to impress at your next dinner party, mastering this Italian-American staple will earn you serious kitchen credibility.
This hearty baked pasta dish has rightfully earned its place in the comfort food hall of fame. Similar to its cousin baked ziti, rigatoni offers a delightful twist with its larger, ridged tubes that capture sauce in every bite. The beauty of baked rigatoni lies in its versatility—it welcomes customization while remaining true to its soul-satisfying essence.
What Makes the Perfect Baked Rigatoni?

Before we dive into techniques, let's understand what elevates a good baked rigatoni to greatness. The perfect baked rigatoni balances three critical elements: properly cooked pasta with just enough bite, a flavorful sauce that clings to every ridge, and a harmonious blend of cheeses that creates both creaminess throughout and that coveted golden crust on top.
The secret? It's all in the technique. America's Test Kitchen, whose rigorous testing we admire (and whose stamp of approval our spatulas proudly bear), emphasizes that proper pasta cooking is non-negotiable. And we couldn't agree more—the foundation of any stellar baked pasta begins with perfectly al dente rigatoni.
Understanding Rigatoni: The Pasta with Purpose
Rigatoni isn't just another pasta shape—it's engineered for dishes like this. Those rigid exterior ridges and hollow center serve a purpose: capturing and holding sauce while maintaining structural integrity during baking. Unlike smoother pasta varieties, rigatoni's texture creates the perfect sauce-to-pasta ratio in every bite.
While baked ziti offers a similar experience (and can substitute in a pinch), rigatoni's larger diameter and ridged exterior make it the superior choice for baked dishes. Those ridges grip sauce like tiny hands, ensuring flavor in every forkful, while the hollow center allows heat to distribute evenly during baking.
Essential Technique #1: Perfecting Your Pasta

The cardinal rule of baked pasta dishes: always undercook your pasta. This isn't just a suggestion—it's the difference between a perfectly textured dish and a mushy disappointment. When making baked rigatoni, you're essentially cooking your pasta twice: first in water, then again in the oven.
Cook your rigatoni for 2-3 minutes less than the package directions suggest. It should be firmer than al dente—what Italian chefs call "molto al dente." This might feel wrong as you test a piece (it will be quite firm), but trust the process. Your pasta will continue cooking in the oven, absorbing sauce and reaching the perfect texture in the finished dish.
Another pro tip: generously salt your pasta water. We're talking about water "as salty as the Mediterranean Sea," as the Italian saying goes. This is your only opportunity to season the pasta itself, and it makes a noticeable difference in your final dish. Aim for about 1-2 tablespoons of kosher salt per gallon of water.
The Drain and Dress Method
Once your rigatoni reaches that molto al dente stage, drain it—but don't rinse! That starchy coating helps your sauce adhere to the pasta. Instead, toss the hot pasta with a small amount of olive oil to prevent sticking if you're not mixing it with sauce immediately.
For the best baked rigatoni recipe results, consider tossing your pasta with a portion of your sauce right away. This prevents clumping and begins the flavor-melding process. The pasta will continue absorbing flavors as it bakes, creating depth that simply can't be achieved with last-minute assembly.
Essential Technique #2: Creating Depth in Your Sauce

While you could simply open a jar of marinara and call it a day (and sometimes, on busy weeknights, that's perfectly acceptable), creating a sauce with depth transforms ordinary baked rigatoni into something memorable. The good news? Building flavor doesn't have to be complicated or time-consuming.
For baked rigatoni with sausage—a particularly delicious variation—start by browning Italian sausage removed from its casing. Use your DI ORO spatula to break it into small pieces as it cooks, creating more surface area for caramelization. This browning process creates the Maillard reaction, developing complex flavors that form the foundation of your sauce.
Layering Aromatics for Maximum Flavor
Once your meat is browned (or before, if making a vegetarian version), sauté aromatics like onions and garlic until translucent and fragrant. This crucial step releases their essential oils and sweetens their flavor profile. For an elevated touch, add a splash of red wine and let it reduce before incorporating your tomatoes—this adds acidity and depth that balances the richness of the cheese.
For the tomato component, you have options. Jarred marinara offers convenience, while crushed tomatoes provide texture. For maximum control over flavor, start with whole canned San Marzano tomatoes, crushing them by hand for a rustic texture. Simmer your sauce until slightly thickened—remember that excess moisture is the enemy of baked pasta dishes.
The Herb Strategy
When it comes to herbs, there's a two-phase approach that maximizes flavor. Add dried herbs (oregano, basil, thyme) early in the cooking process to infuse the oil and sauce with their concentrated flavors. Reserve fresh herbs for finishing—either stirred into the completed sauce just before assembly or sprinkled on top before serving.
For baked rigatoni with ricotta, consider mixing fresh herbs directly into your ricotta blend. This creates pockets of herbal brightness throughout the dish that contrast beautifully with the rich sauce and cheese.
Essential Technique #3: The Cheese Matrix

The cheese component of baked rigatoni isn't just about flavor—it's about structure. Creating what I like to call the "cheese matrix" involves strategically combining different cheeses for their melting properties, flavor contributions, and textural elements.
For the creamiest baked rigatoni, a combination of at least three cheeses creates the ideal balance. Ricotta provides a creamy base, mozzarella delivers that stretchy pull we all crave, and Parmesan or Pecorino Romano adds sharp, salty depth. This trinity creates a complex flavor profile that elevates your dish from good to unforgettable.
The Ricotta Technique You Never Knew You Needed
Here's where many home cooks miss an opportunity: ricotta straight from the container can be watery and grainy. Take an extra minute to transform it by mixing it with an egg (which helps it set during baking), a handful of grated Parmesan, and a pinch of nutmeg. This simple step creates a silky, flavorful cheese layer that distributes beautifully throughout your baked rigatoni.
For those seeking the ultimate cheese experience, consider adding a layer of thinly sliced fresh mozzarella on top during the last 15 minutes of baking. This creates dramatic cheese pulls and a beautiful golden crust that makes your baked rigatoni as visually appealing as it is delicious.
Essential Technique #1: Perfecting Your Pasta
The cardinal rule of baked pasta dishes: always undercook your pasta. This isn't just a suggestion—it's the difference between a perfectly textured dish and a mushy disappointment. When making baked rigatoni, you're essentially cooking your pasta twice: first in water, then again in the oven.
Cook your rigatoni for 2-3 minutes less than the package directions suggest. It should be firmer than al dente—what Italian chefs call "molto al dente." This might feel wrong as you test a piece (it will be quite firm), but trust the process. Your pasta will continue cooking in the oven, absorbing sauce and reaching the perfect texture in the finished dish.
Another pro tip: generously salt your pasta water. We're talking about water "as salty as the Mediterranean Sea," as the Italian saying goes. This is your only opportunity to season the pasta itself, and it makes a noticeable difference in your final dish. Aim for about 1-2 tablespoons of kosher salt per gallon of water.
The Drain and Dress Method
Once your rigatoni reaches that molto al dente stage, drain it—but don't rinse! That starchy coating helps your sauce adhere to the pasta. Instead, toss the hot pasta with a small amount of olive oil to prevent sticking if you're not mixing it with sauce immediately.
For the best baked rigatoni recipe results, consider tossing your pasta with a portion of your sauce right away. This prevents clumping and begins the flavor-melding process. The pasta will continue absorbing flavors as it bakes, creating depth that simply can't be achieved with last-minute assembly.
Essential Technique #2: Creating Depth in Your Sauce
While you could simply open a jar of marinara and call it a day (and sometimes, on busy weeknights, that's perfectly acceptable), creating a sauce with depth transforms ordinary baked rigatoni into something memorable. The good news? Building flavor doesn't have to be complicated or time-consuming.
For baked rigatoni with sausage—a particularly delicious variation—start by browning Italian sausage removed from its casing. Use your DI ORO spatula to break it into small pieces as it cooks, creating more surface area for caramelization. This browning process creates the Maillard reaction, developing complex flavors that form the foundation of your sauce.
Layering Aromatics for Maximum Flavor
Once your meat is browned (or before, if making a vegetarian version), sauté aromatics like onions and garlic until translucent and fragrant. This crucial step releases their essential oils and sweetens their flavor profile. For an elevated touch, add a splash of red wine and let it reduce before incorporating your tomatoes—this adds acidity and depth that balances the richness of the cheese.
For the tomato component, you have options. Jarred marinara offers convenience, while crushed tomatoes provide texture. For maximum control over flavor, start with whole canned San Marzano tomatoes, crushing them by hand for a rustic texture. Simmer your sauce until slightly thickened—remember that excess moisture is the enemy of baked pasta dishes.
The Herb Strategy
When it comes to herbs, there's a two-phase approach that maximizes flavor. Add dried herbs (oregano, basil, thyme) early in the cooking process to infuse the oil and sauce with their concentrated flavors. Reserve fresh herbs for finishing—either stirred into the completed sauce just before assembly or sprinkled on top before serving.
For baked rigatoni with ricotta, consider mixing fresh herbs directly into your ricotta blend. This creates pockets of herbal brightness throughout the dish that contrast beautifully with the rich sauce and cheese.
Essential Technique #3: The Cheese Matrix
The cheese component of baked rigatoni isn't just about flavor—it's about structure. Creating what I like to call the "cheese matrix" involves strategically combining different cheeses for their melting properties, flavor contributions, and textural elements.
For the creamiest baked rigatoni, a combination of at least three cheeses creates the ideal balance. Ricotta provides a creamy base, mozzarella delivers that stretchy pull we all crave, and Parmesan or Pecorino Romano adds sharp, salty depth. This trinity creates a complex flavor profile that elevates your dish from good to unforgettable.
The Ricotta Technique You Never Knew You Needed
Here's where many home cooks miss an opportunity: ricotta straight from the container can be watery and grainy. Take an extra minute to transform it by mixing it with an egg (which helps it set during baking), a handful of grated Parmesan, and a pinch of nutmeg. This simple step creates a silky, flavorful cheese layer that distributes beautifully throughout your baked rigatoni.
For those seeking the ultimate cheese experience, consider adding a layer of thinly sliced fresh mozzarella on top during the last 15 minutes of baking. This creates dramatic cheese pulls and a beautiful golden crust that makes your baked rigatoni as visually appealing as it is delicious.
Assembling Your Baked Rigatoni Masterpiece
Now comes the fun part—bringing all these elements together. The assembly method you choose affects both the final texture and presentation of your baked rigatoni recipe. There are two primary approaches, each with its own merits.
The Layer Method vs. The Mix Method
The Layer Method creates distinct strata of flavor, similar to lasagna. Start with a thin layer of sauce on the bottom of your baking dish (prevents sticking), then add half your pasta, half your ricotta mixture, half your remaining sauce, and a generous sprinkle of mozzarella. Repeat these layers, finishing with a blanket of cheese on top.
The Mix Method, by contrast, combines all elements except the top cheese layer in a large bowl before transferring to the baking dish. This creates a more homogeneous dish where every bite contains all components. It's less dramatic when served but ensures consistent flavor throughout.
Which is better? That depends on your preference and presentation goals. For family dinners, the mix method ensures everyone gets a bit of everything. For impressive dinner parties, the layer method creates a more visually striking dish when served.
The Baking Vessel Matters
Don't overlook your choice of baking dish—it significantly impacts your final result. A ceramic or enameled cast iron dish retains heat beautifully, creating those coveted crispy edges. A deeper dish yields a creamier center, while a shallower, wider dish maximizes surface area for that golden cheese top everyone fights over.
At DI ORO, we're partial to a 9x13 ceramic baking dish for the perfect balance of crispy top and creamy interior. Whatever vessel you choose, be sure to grease it lightly or give it a quick spray of cooking oil to prevent sticking—nothing ruins a beautiful baked rigatoni faster than leaving half of it welded to the dish!
Perfecting the Bake: Timing and Temperature

The final step in your journey to baked rigatoni perfection is mastering the bake itself. Preheat your oven to 375°F (190°C)—this moderate temperature allows for even cooking without burning the cheese before the interior is heated through.
For a standard 9x13 dish of baked rigatoni, you're looking at approximately 25-30 minutes of baking time. However, rather than relying solely on the clock, use visual cues: the edges should be bubbling, and the top should be golden brown with some darker spots where the cheese has caramelized.
The Rest Period: Don't Skip This Step!
Once you've pulled your bubbling masterpiece from the oven, resist the urge to dive in immediately. Allowing your baked rigatoni to rest for 10-15 minutes accomplishes two crucial things: it lets the internal temperature stabilize (preventing burnt mouths) and gives the cheese structure time to set, resulting in cleaner, more presentable portions.
During this rest period, the flavors continue to meld and intensify. Think of it as the finale of your three-act flavor development process: first in the sauce preparation, then during the bake, and finally during the rest. Your patience will be rewarded with a more cohesive, flavorful dish.
Serving Your Baked Rigatoni with Style
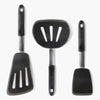
When it's finally time to serve, reach for your DI ORO spatula—its heat-resistant, flexible edge slides easily along the sides of your baking dish, cleanly releasing those delicious crispy bits without scratching your cookware. Garnish with fresh basil leaves, a light drizzle of extra virgin olive oil, or a final dusting of freshly grated Parmesan.
Pair your baked rigatoni with a simple green salad dressed with lemon and olive oil to cut through the richness, or some garlic bread to soak up any remaining sauce. A medium-bodied red wine like Chianti or Montepulciano complements the tomato and cheese flavors beautifully.
Remember, the best baked rigatoni isn't just about following a recipe—it's about understanding these fundamental techniques and making them your own. Master these three essentials, and you'll be creating baked pasta dishes worthy of your most treasured family gatherings for years to come.
Baked Rigatoni Variations: Making It Your Own
Now that you've mastered the essential techniques of pasta preparation, sauce development, and the perfect cheese matrix, it's time to explore how versatile baked rigatoni truly is. This classic dish serves as a perfect canvas for culinary creativity—a place where you can express your unique taste preferences while maintaining the comforting essence that makes baked rigatoni so beloved.
Think of your baked rigatoni recipe as a framework rather than a rigid set of instructions. Once you understand the fundamental techniques, you can adapt and modify to create a signature dish that's uniquely yours. After all, the best home chefs don't just follow recipes—they make them their own.
Beyond Italian Sausage: Protein Possibilities
While baked rigatoni with sausage offers incredible flavor, don't feel limited to this classic choice. Ground beef creates a heartier, more traditional casserole experience, while ground turkey or chicken lightens the dish without sacrificing satisfaction. For the adventurous, consider pancetta or prosciutto, which add a salty depth that pairs beautifully with the creamy cheese elements.
Vegetarians can create equally satisfying versions by incorporating hearty mushrooms (portobello or cremini work beautifully), roasted eggplant, or even plant-based meat alternatives. The key is to build flavor through proper browning and seasoning—a technique that applies regardless of your protein choice.
For a truly luxurious twist, consider seafood variations. Shrimp, scallops, or even chunks of salmon can transform baked rigatoni into an elegant dinner party centerpiece. When using seafood, adjust your cooking technique accordingly—these delicate proteins should be added later in the process to prevent overcooking.
Elevating Your Cheese Game
While our cheese matrix of ricotta, mozzarella, and Parmesan creates a fantastic foundation, the world of cheese offers endless possibilities for customization. For baked rigatoni with ricotta, consider upgrading to fresh ricotta from a specialty shop—its clean, milky flavor and superior texture elevate the entire dish.
For a more distinctive flavor profile, experiment with fontina for nutty richness, smoked mozzarella for depth, or even blue cheese (used sparingly) for unexpected pockets of intensity. Remember, cheese isn't just about flavor—each variety brings different melting properties that affect your final texture.
Don't overlook the finishing cheeses either. While Parmesan is traditional, aged pecorino, grana padano, or even a sprinkle of tangy goat cheese can add memorable final notes. At DI ORO, we've found that a combination of cheeses often creates the most complex and satisfying flavor profile—much like how a well-balanced spice blend outperforms any single seasoning.
Seasonal Adaptations for Year-Round Enjoyment
One of the greatest attributes of a classic baked rigatoni recipe is its adaptability to seasonal ingredients. This versatility allows you to enjoy this comfort food favorite throughout the year while taking advantage of the freshest produce available.
In summer, lighten your baked rigatoni by incorporating fresh cherry tomatoes (which burst during baking, releasing their sweet juices), zucchini ribbons, and abundant fresh basil. A lighter touch with the cheese and a brighter, less simmered sauce creates a version that satisfies without weighing you down on warm evenings.
Fall calls for heartier additions—roasted butternut squash adds sweet depth, while kale or Swiss chard provides earthy notes and nutritional balance. Winter versions might incorporate slow-roasted tomatoes for concentrated flavor, while spring welcomes tender asparagus tips, fresh peas, and delicate herbs like chervil or tarragon.
Creating a Signature Sauce
While the classic marinara-based sauce forms the foundation of most baked rigatoni recipes, adventurous home chefs can create signature variations that set their dish apart. A splash of cream transforms your sauce into a rosa that pairs beautifully with seafood. A dollop of pesto stirred into your ricotta mixture creates vibrant green pockets of herbal intensity throughout the dish.
For an unexpected twist, consider a white baked rigatoni with a béchamel base enhanced with roasted garlic, white wine, and thyme. This elegant variation pairs beautifully with chicken, mushrooms, and fontina cheese for a sophisticated take on comfort food.
Whatever direction you choose, remember that the best sauce for baked rigatoni should be slightly thicker than what you'd use for regular pasta. This concentration of flavor accounts for the dilution that occurs as the pasta absorbs moisture during baking. Your DI ORO spatula is perfect for achieving the ideal consistency—its flexible edge lets you feel the resistance of the sauce as you stir, helping you develop an intuitive sense of when it's just right.
Troubleshooting Common Baked Rigatoni Challenges
Even experienced home chefs occasionally encounter challenges when making baked rigatoni. Understanding how to address these common issues ensures consistent success, transforming potential kitchen frustrations into valuable learning experiences.
If your baked rigatoni turns out dry, you likely need more sauce or your pasta was overcooked before baking. Remember our cardinal rule: undercook the pasta and ensure your sauce is plentiful enough to account for absorption during baking. A good rule of thumb: when you think you have enough sauce, add another half cup.
Conversely, if your dish is too watery, you may need to simmer your sauce longer to reduce excess moisture or drain your ricotta before using. Another culprit might be your mozzarella—fresh mozzarella packed in water should be thoroughly dried with paper towels before adding to your dish.
Make-Ahead and Storage Strategies
One of the greatest virtues of baked rigatoni is its make-ahead potential. You can assemble the entire dish up to 24 hours before baking—simply cover with plastic wrap and refrigerate. When ready to bake, remove from the refrigerator 30 minutes beforehand to take the chill off, then add an extra 10-15 minutes to your baking time.
For longer-term planning, unbaked rigatoni freezes beautifully for up to three months. Wrap tightly in plastic wrap, then foil, and label clearly with date and baking instructions. When ready to enjoy, thaw overnight in the refrigerator before baking as directed, adding about 15-20 minutes to the baking time.
Leftover baked rigatoni actually improves after a day in the refrigerator as flavors continue to meld. Reheat individual portions in the microwave for quick lunches, or return the entire dish to a 325°F oven, covered with foil, until heated through (about 20 minutes). Your DI ORO spatula, with its heat-resistant silicone that's safe up to 600°F, makes portioning and serving leftovers a breeze without damaging your cookware.
Bringing It All Together: The Final Touch
As we conclude our deep dive into the art of baked rigatoni, remember that the most memorable dishes combine technical skill with personal touches. The techniques we've explored—proper pasta preparation, developing depth in sauces, and creating the perfect cheese matrix—provide the foundation for excellence. Your personal touches make it uniquely yours.
Whether you're creating the best baked rigatoni recipe for a weeknight family dinner or an impressive centerpiece for entertaining, attention to detail elevates the ordinary to extraordinary. A final drizzle of high-quality olive oil, a scatter of freshly torn herbs, or even a light dusting of lemon zest can add that professional finishing touch that signals thoughtful preparation.
At DI ORO, we believe that cooking isn't just about feeding bodies—it's about creating experiences. When you present a bubbling dish of perfectly baked rigatoni, you're offering more than food; you're sharing comfort, tradition, and care made tangible. With your trusty heat-resistant, forever-chemical-free DI ORO spatula in hand, you have the perfect partner for creating these meaningful culinary moments.
Your Culinary Journey Continues
Mastering baked rigatoni builds confidence and skills that translate to countless dishes—from developing rich sauces to understanding how cheese melts. The kitchen is a space for tradition and creativity, and your baked rigatoni can reflect both heritage and personal flair. With essential techniques now in your toolkit, you’re ready to create pasta bakes that impress every time.
Share your creations and tag DI ORO to inspire fellow home chefs and be part of our growing community. So grab your DI ORO spatula, preheat the oven, and bring your best baked rigatoni to the table—it’s time to turn a classic into your signature dish.
Craving more ideas? Try our Loco Moco or level up your garlic bread with our sourdough starter—perfect with baked rigatoni.
Frequently Asked Questions
What is the difference between baked ziti and baked rigatoni?
The primary difference between baked ziti and baked rigatoni lies in the type of pasta used. Baked ziti uses ziti, a smooth, tubular pasta, while baked rigatoni features rigatoni, which are larger tubes with ridges along the sides. These ridges on rigatoni help hold onto sauce and cheese better, giving a heartier texture. Additionally, the shape and size can slightly affect the overall mouthfeel and how the dish bakes.
What temperature do you bake rigatoni at?
Baked rigatoni is typically baked at 350°F (175°C). This temperature allows the pasta to heat through evenly while melting the cheese and thickening the sauce without burning. Baking at this moderate temperature also helps create a delicious golden crust on top after about 25 to 30 minutes.
Should you cover pasta when baking in oven?
It's often recommended to cover baked pasta with foil during the first part of baking to keep moisture in and prevent the pasta from drying out. Covering helps the dish heat evenly and keeps the sauce from drying while the cheese melts. You can remove the foil in the last 5 to 10 minutes to allow the top to brown and become bubbly.
What temperature to bake pasta in the oven?
Most baked pasta recipes call for baking at around 350°F to 375°F (175°C to 190°C). This range is ideal for thoroughly heating the pasta, melting cheese, and allowing the sauce to thicken without burning. Cooking times usually vary between 20 to 40 minutes depending on the recipe and whether the pasta is covered or uncovered.
What sauce goes best with rigatoni?
Rigatoni pairs wonderfully with hearty, chunky sauces that cling well to its ridges, such as classic marinara, meat-based Bolognese, or creamy Alfredo. The ridges and wide tube shape make rigatoni perfect for holding thick sauces loaded with vegetables or ground meats. For baked dishes, a rich tomato sauce mixed with mozzarella and Parmesan cheese creates a comforting combination.
What pan is best for baked pasta?
A glass or ceramic baking dish is often the best choice for baked pasta because it distributes heat evenly and allows the pasta to cook uniformly. These materials also help develop a nicely browned crust on top. Alternatively, metal pans can be used for quicker browning, but they require careful monitoring to avoid burning.